Cosmic Vision GUI Guide
The Cosmic Vision GUI allows you to configure meters, timing, button mappings, profiles, and visual overlays.
This guide explains every section of the interface so you can tune Vision for your exact playstyle.
Tooltips Available
Hover your mouse over any ? icon inside the GUI to see detailed explanations for each option.
1. General Tab
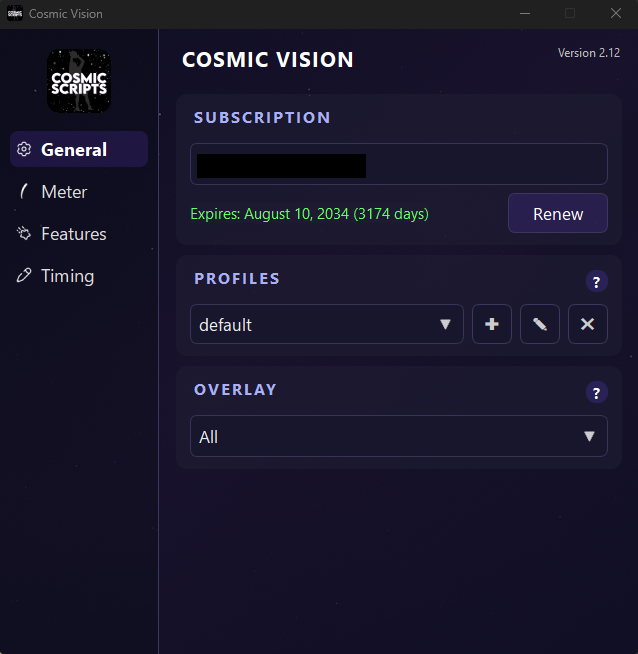
Subscription
Displays your account information:
- Discord ID
- Expiration date (days remaining)
- Renew button — opens the purchase page
(This does not auto-renew your subscription)
Profiles
Profiles allow you to save different setups for different builds, latency conditions, or mappings.
You can:
- Add a new profile ( ✚ button)
- Rename the selected profile ( ✎ button)
- Delete the selected profile ( ✖ button)
All settings save automatically to the selected profile. When creating a new profile, all settings are copied from the current selected profile.
Overlay
Controls what visual information appears over your capture card feed.
Options include:
- Full Overlay — full value display (lower FPS)
- Meter Only — only meter recognition (balanced FPS)
- Off — disables overlay (maximum FPS)
Increase FPS
Set Overlay to Off or Meter Only for best performance.
2. Meter Tab
These settings must match your in-game shot meter settings.
Meter Type
Select the shot meter style currently used in-game.
Options include:
- Dial (25)
- Arrow
- Arrow 2
- Straight
- Pill
Meter Color
Choose from preset colors or enter a custom color.
Options include:
- Purple
- Yellow
- Red
Using a Custom Meter Color
You can directly sample your in-game meter color for perfect accuracy.
Follow these steps:
- In your game’s Customize HUD settings, select the meter color you want
- In the Vision GUI, open the Meter Color dropdown and select Custom
- Click the color swatch box next to the Custom field
- Select Pick from Screen
- Open the Cosmic Vision window that shows your overlays
- Hover your cursor over the colored part of your meter
(Arrow 2 Large is easiest to sample) - Click to select the color, then press OK
Vision will automatically save and convert the sampled color into the required BGR format.
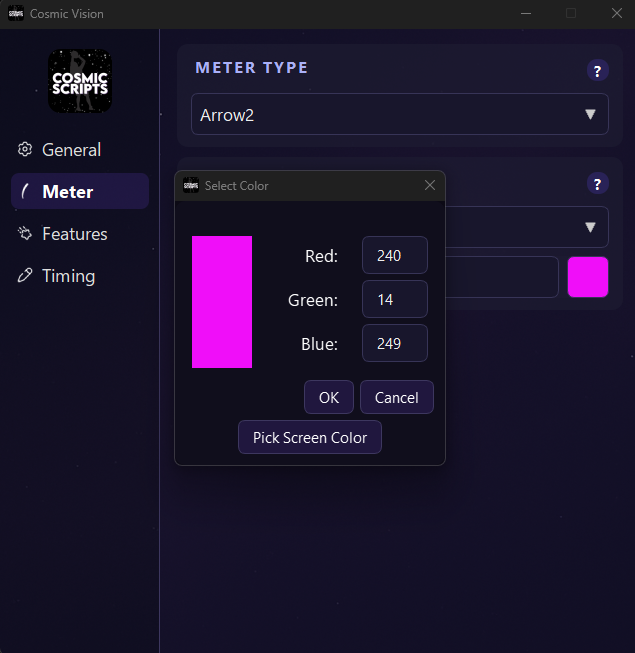
Meter Detection
If your meter detection box is flickering or bouncing around a lot, use or redo your custom meter color.
3. Features Tab
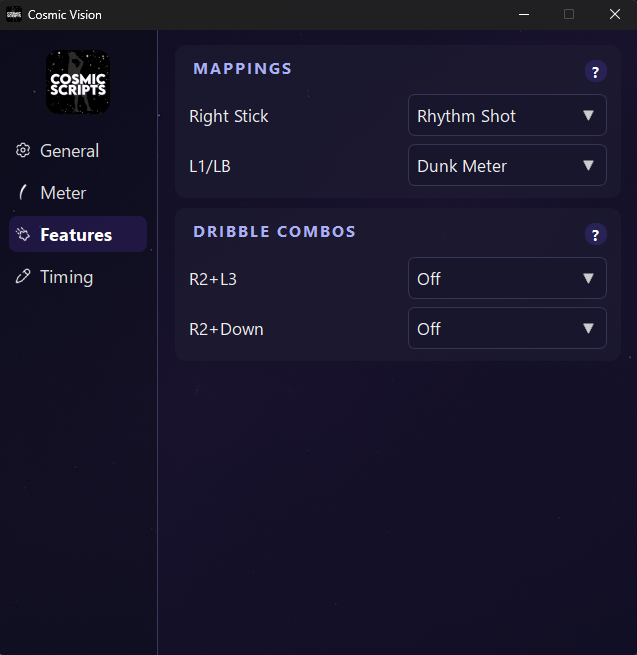
Mappings
Assign special functionality to specific inputs such as:
- Rhythm Shot
- Dunk Meter
- Layup
These change how Vision interprets your controller inputs.
Dribble Combos
Currently unsupported, but reserved for future functionality.
4. Timing Tab
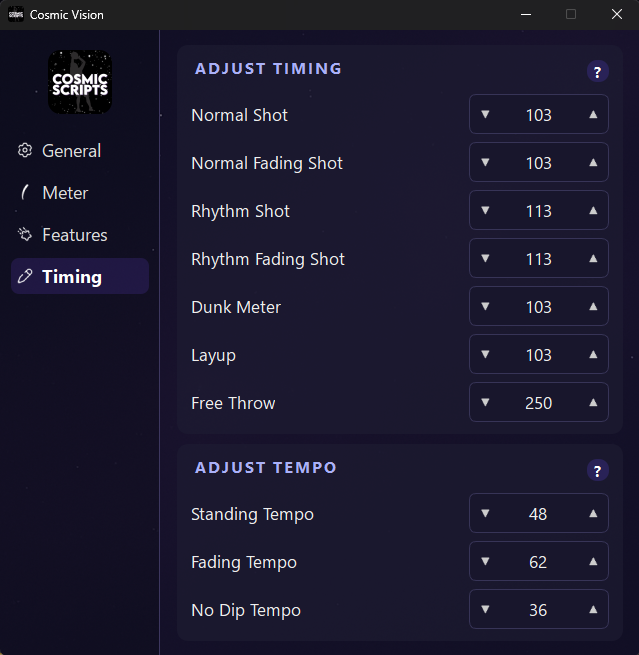
This section is where you fine-tune timing and tempo for maximum consistency.
Timing Values
Controls when the shot button releases — i.e., where the meter ends.
Start at 100–130 on “Arrow 2” as a recommended baseline.
Which value do I adjust?
SQUARE/XShooting — Normal/Normal FadingRS DOWNRhythm Shooting — Rhythm ShotRS UPRhythm Shooting — Rhythm Fading Shot- Remapped Dunk Meter — Dunk Meter
- Remapped Layup — Layup
UP DPAD+SQUARE/XFree Throws — Free Throw
Adjust based on shot feedback:
- Late → Increase the timing value
- Early → Decrease the timing value
Small Adjustments Matter
Change values in increments of 5–10 until you find your sweet spot.
Free Throw Timing
To use Free Throw timing in game, hold UP DPAD + SQUARE/X.
If you want to time these yourself, you can set the value to 250, and time them using the same mapping.
Tempo Values
Controls how fast the right stick flicks the opposite direction during Rhythm Shots.
Which value do I adjust?
RS DOWNRhythm Shooting — Standing TempoRS UPRhythm Shooting — Fading TempoL2+RS DOWNRhythm Shooting — No Dip Tempo
Adjust using:
- Slightly Slow → Decrease the tempo value
- Slightly Rushed → Increase the tempo value
Note
Tempo is separate from Timing — Tempo affects stick motion speed, while Timing affects release frame.
5. Final Tips
- Always make sure your meter settings match in-game
- Use profiles for different builds or latency setups
- Enable Overlay → Meter if you need visual confirmation while balancing FPS
- Small adjustments can drastically improve consistency, but adjust based on the majority of your shot results
For the best results, follow the usage guide below.
Next Steps
Best Results Guide — to learn how to properly use Cosmic Vision
Troubleshooting — common issues and fixes